| Photo Essentials |
If you want to add your own photos to your First Class database, you will probably need to do some work on them. A good photo editing program is most helpful. The best by far is Adobe Photoshop, but it costs about $600!! There is a trimmed-down version called Adobe Photoshop Elements 3.0, which is under $100. Another good one is Jasc PaintShop Pro, also around $100. If your budget is really limited, try IrfanView, which is free! While Irfanview's features are limited, it can be used for all of the tasks you will need to prepare your photos for First Class Version 2.
All of the photos in the First Class database are JPEG files, 220 x 165 pixels (220 pixels wide by 165 pixels high), compressed to 80%, and their file size is approximately 10 KB each. This size is a compromise to have a photo that's large enough to see details, yet not so large that it takes up too much hard drive space and takes forever to download. (Photos are added to each update.) Your photos do not need to be that exact size, but the important thing is that they have approximately the same 4:3 relative dimensions — in other words, the height should be ¾ of the width. Most digital cameras can produce an image that's 640 x 480 pixels. That's perfect. If the relative dimensions are too far from the 4:3 ratio, First Class will alert you to that fact. If you don't correct it, here's what can happen:
|
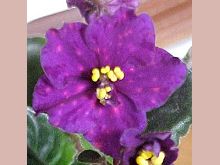
The
original is 240 x 246 pixels — |
The
program, however, displays it |

In this tutorial we're going to learn how to deal with five different situations:
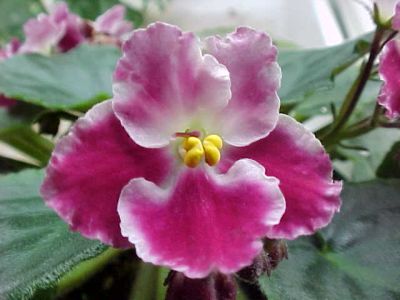
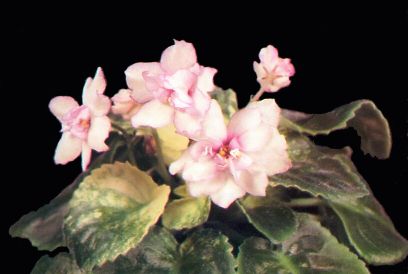
This photo is 400 x 300 pixels, which is a perfect ratio. The composition is good. The photo doesn't even need to be resized, but you can resize it to 220 x 165 if you want to save space on your hard drive.
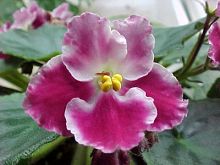
This photo is 480 x 360. The ratio is 4:3, which is perfect, but if it's just resized to 220 x 165 the blossom will get lost in the frame. It would probably look better if the blossom filled more of the frame, and if it were centered in the frame. Crop it to the desired height, resize it to 165 pixels high, then crop it to 220 pixels wide.
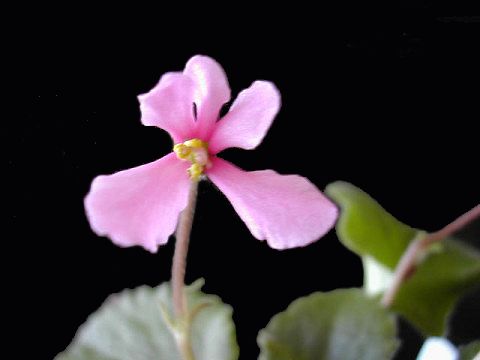
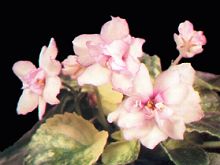
This one is 408 x 274. It could also use cropping and resizing, but when there are two or more blossoms side-by-side, it's usually better to first crop it to the desired width, resize it to 220 pixels wide, then crop it to the desired height (165 pixels).
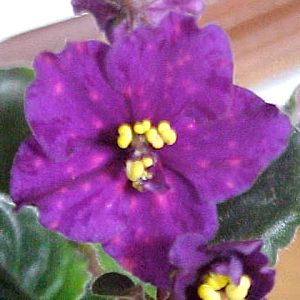
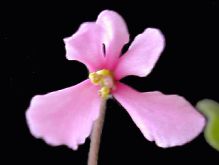
Some photos are more or less square, or they are taller than they are wide. This one is 300 x 300. This is the most challenging, because we can't crop it to a rectangular shape without losing some of the blossom. In this case, we'll resize it to the 165 pixels high, then add a colored border to the sides to make it 220 pixels wide.
![]()
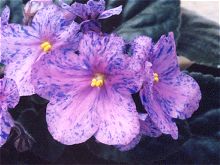
Using your photo editing software, you can really enhance a photo by working with the brightness, contrast, and saturation. Here's a good example. This photo looks dull, dark, and washed-out:

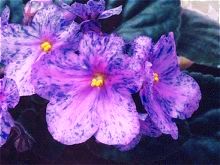
By increasing brightness, contrast, and saturation, as well as sharpening the photo, it can look dramatically better:
Just be careful that you don't change the settings so much that they make the blossom look unnatural. This can especially happen if you increase the saturation too much:
Now that you have your photo cropped, resized, and adjusted for brightness, contrast, and saturation, it's time to save the photo. You will need to save it as a JPEG file for First Class Version 2 to use it. While the photos in the database are compressed to 80%, you might want to use a little higher-quality setting, since you won't need to worry about download size — maybe 90% would be a good choice.
Note that some photo editing programs use higher numbers for higher quality, while others use lower numbers for higher quality. In the case of the latter, you would use a compression factor of 10% instead of 90%.
Now you should have a general understanding of how to prepare photos for inclusion in your First Class database. Experiment with your own photo editing software, and you should be an expert in no time.